
IDE Hard Drive Adapter 44-40 Pin with Bracket Kit 2.5 to 3.5 Inch HD-108
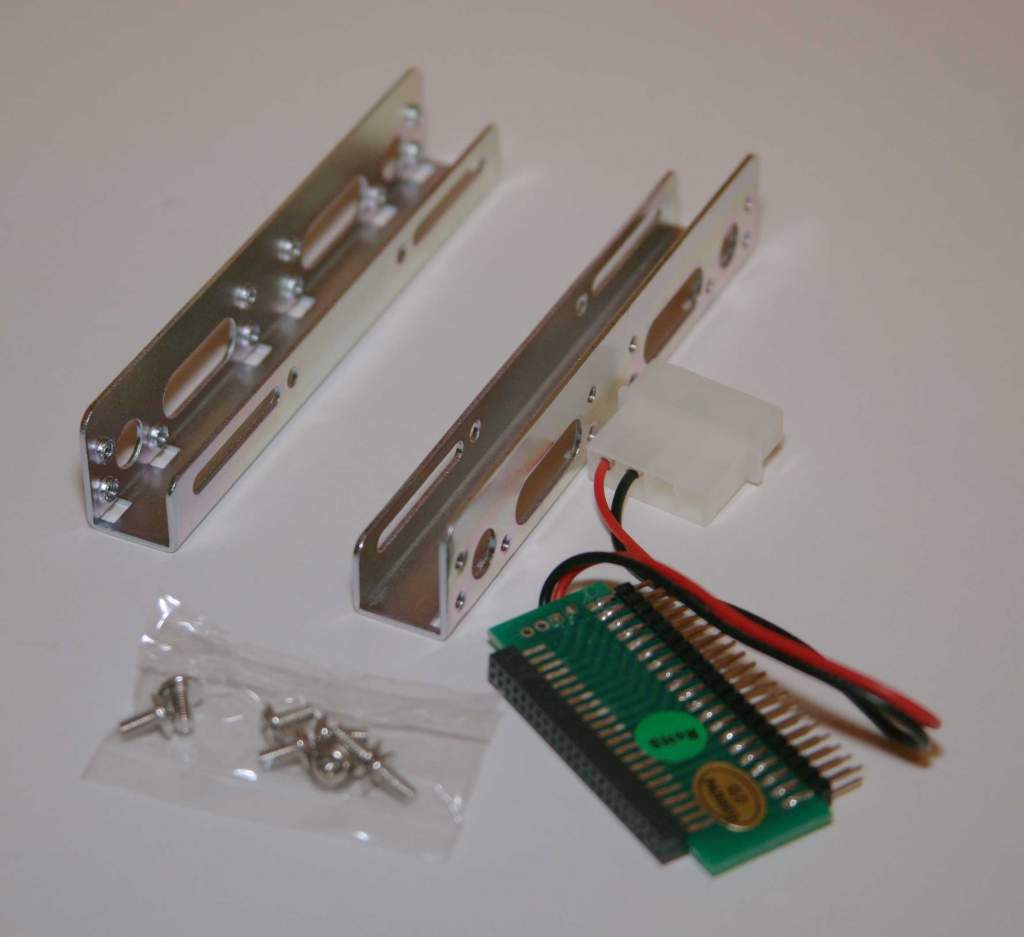


Special IDE adapter with Power and Bracket.
This Kit is used to convert a 2.5" IDE hard drive 44 Pin used in many laptops to a 3.5 Inch hard drive with standard power and 40 Pin IDE connections.
Mini Jumpers for Drives are Part Number 03005